PAL 50/60Hz switch

Hey,

I'm soon to get a Saturn (if all goes according to plan), and had a few questions regarding the 50/60Hz modification to a Sega Saturn system. What has the experience been like in terms of performance? Any degradation in terms of picture quality? Connector issues?

Though, I plan to acquire s-video and A/V cables. Rather than use an RF adapter. Which I (correctly?) understand to be limited to 50Hz. Not that I've ever been in the habit of using RF adapters unless it's absolutely necessary.

And lastly. While I've been told this is a 50/60Hz switch and not a PAL/NTSC switch, I just want to be absolutely sure on that. Since, while my TV supports PAL60, it doesn't support NTSC at all. Unless I want to play games in black in white (heh, which I don't).

Also, I'm in Australia. Hence why I plan to use s-video or A/V rather than SCART.
 
I was under the impression that it was a pal/ntsc switch, being that the internals of the saturn over here in the us and over there are the same except for the power suply I thought.
 
I didnt make a switch in my PAL Saturn (first model, with seperate PSU and oval buttons), I just bridged JP1 with some solder and it worked fine for a few days. No degradation in picture quality or anything (although I used a SCART RGB lead). However, after a week it started to rapidly switch between 50hz and 60hz, sometimes several times a second. So I de- and then re-soldered the bridge and it works like a dream now :cool:
 
AFAIK it is just a 50Hz/60Hz mod rather than a PAL/NTSC mod because you're not actually doing anything with the video encoding chip (Sony CXA1645), but rather VDP 1.

To change from PAL to NTSC you'd need to connect pin 7 on the CXA1645 to 5v rather than to ground.
 
Okay. Thanks for the replies thus far.

Leading into my second question. I'm not exactly proficient when it comes to fiddling around with the insides of electrical equipment (read: not at all). Nor is anyone else I know. So is anyone aware of any people in Australia who perform these kinds of modifications?

I don't mind the cost so much. Heck, I'd be willing to send the system overseas if need be. Though I'd rather not let it come to that unless absolutely necessary.
 
Originally posted by Waren Al'Kar@Dec 11, 2003 @ 03:54 PM

So is anyone aware of any people in Australia who perform these kinds of modifications?

I've never tried this mod before, but I'm sure it can't be that hard. ;)
 
Hi Waren,

Good post :thumbs-up: .

I have a large amount of info on Modding the Sega machines.

The best thing you can ever do to the Saturn is to start the 50/60 mod.

It is not hard at all and will TRANSFORM the machine into the beast it really is.

I have modded over 7 machines (all my own) and they are still ok after 3 years.

get this---YOU DONT EVEN NEED SOLDER---- :lol: Honestly Waren.

If you take a HB pencil you can literally etch the jumpers together with lead.

The lead acts just like Solder,I did this last month and it really works.

It works for the country mod aswell which is another advantage beacuse you can just erase the joint from the board with a rubber.

Any pencil will do but i would imagine a 2b etc which has more lead will do afaster and neater job.

Best thing i ever did was to mod the saturn and Megadrive,50hz just pails into comparison on my Sony tv.

Also thanks to Mal who has recently helped me out,

Hi Mal----YOU ARE THE DADDY.. :smokin: :smokin: :smokin:

IAN.(uk) :thumbs-up:
 
Hi Scarred Rabbit,

Thanks for the post.

The pencil technique does work 100%.

I got the tip from my brother who build pc systems up.

He told me that it is a well known fact that when people "overclock"the main proccessors of a pc 'A pencil is the ideal instrument.

I also asked him why it works and he just told em that the Pencil acts like a conductor,So i may be wrong in assuming it is similar to lead in Solder.

The Carbon and Graphite certainly aid the process and i can only imagine that these materials are doing the mod.

I had a Pal Saturn and played virtua fighter on an unmodded machine.

Did the pencil trick and all is 60hz and correct speed.I also tryed the Country hack and it performs flawlessly.

Would be interesting to get the percentage of conductivity values etc of the pencil lead/Carbon compared to standard Solder?

Thanks for the info,

Ian :thumbs-up:
 
I'm familiar with unlocking athlons, and using graphite from pencil's to do it, however I was just saying that lead in pencils is not in actuality lead.
 
Croft, could you perhaps give some more detailed info on how to do this, maybe with a pic? And does this also work with model 1 saturns? Thanks.
 
HI Sane,

Thanks for the post,

Yes,Certainly Sane,

Will get some better info asap.

I do have a Dijital camera and will take some pics this evening.

The camera is not greta quality but will show where the jumpers are Sane etc.

With regards tot he model 1 i would say the mod will work,The model number will not affect mod performance in any way Sane.

My brother uses the technique all the time when he mods pc boards for home computers.

He overclocks them with pencil lead etc,

Will be back asap.

Thanks Sane,

Ian. :D
 
The reason they use pencil lead is because taking a soldering iron to your cpu would pretty much destroy it. The saturn's mainboard is quite a bit more forgiving.
 
Hi Sane and all at Sega Extreme.

Thanks for the posts,really good info.

Have took some Pics Sane of the mod and how to do it.

Whilst taking the pics i had a look at 5 other Sega saturns that i have.

I took them apart and noticed the different board layouts,Some have a 64 pin chip and others have a 32 pin chip on the main cd rom board.

Here are some pics for the 64 pin model Sega Saturn.

First turn all power off completely from the mains.

Then unscrew the screws from the underneath and also taking the battery panel out aswell.

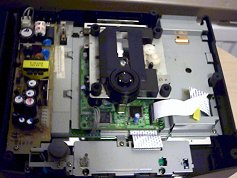
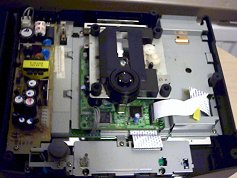
You should have a machine which looks like this. ;)
 

Attachments

  • sega_e_1.jpg
    sega_e_1.jpg
    14.9 KB · Views: 108
  • sega_e_1.jpg
    sega_e_1.jpg
    14.9 KB · Views: 103
Next take all of the insides out accept for the main pcb at the bottom.

The psu board is best taken out by first taking the screws from the back of the 2 pin power cable input,Then gently lift from the bottom of the narrow psu board(CAREFUL NOT TO TOUCH ANY TRANSFORMERS).

The plastic shield can be taken of from an angle.

keep all screws etc in a safe place.

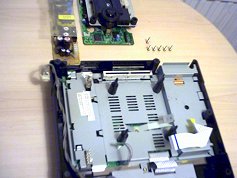
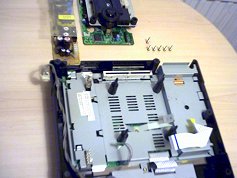
You should now have something like this infront of you.
 

Attachments

  • sega_e_2.jpg
    sega_e_2.jpg
    13.4 KB · Views: 91
  • sega_e_2.jpg
    sega_e_2.jpg
    13.4 KB · Views: 121
Next unscrew the main pcb and take this out and place on to a non static surface like a wooden table or drawing board.

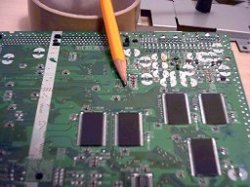
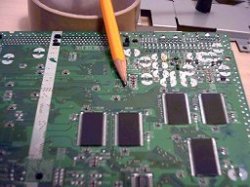
Turn the pcb over and locate items marked JP1 & JP 2.

These are the items which will get your machine running at 60hz and full screen.

Once located simply take a pencil and etch them together with the lead.

It doesnt have to be exact as long as they are joined etc.

This picture shows where they are on the UNDERSIDE of the pcb.

The pencil tip is exactly where they are at.
 

Attachments

  • sega_e5.jpg
    sega_e5.jpg
    17.8 KB · Views: 138
  • sega_e5.jpg
    sega_e5.jpg
    17.8 KB · Views: 125
Now your machine is ready to go in full screen.All uk games aswell as Jap,Usa will run at full frame and how they where intended.

If you want to mod the machine to play Jap,Usa Games simply turn the pcb around so that the on/off switch is facing you at the front.

This time you need to locate another set op JUMPERS (JP).

They are clearly marked just to the bottom and left of the board.

With this mod you will need to use a small blade,Needle or small flat screwdriver.

The exact number of Jumpers is on my computer and i will double check the info.

If i remember ther are 2 sets on the 64 pin uk Saturn.

The first set need to be simply reversed,Take the small blade etc and scrape away the link between which ever Jumper is joined on the first row.Make shure that you have fully removed the solder track between them,Then repeat as before with the pencil lead connecting the opposite jumper.This will give Jap compatability.

Repeat for the lower Jumper and this will give USA compatability.

Once this is done i you can purchase a 3 pole switch from Maplins etc and connct wires from each set of jumpers to this switch.

Conenct as they where to start with.

This will allow you to switch from Jap,Uk,USA games.

I never play uk games as the Jap ones are way better,So i have not put a switch on my machine yet.

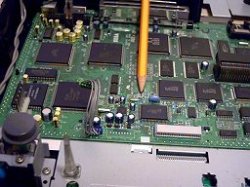
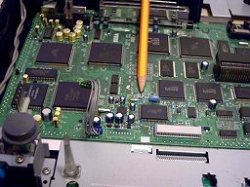
Here is a pic of the Jumpers with pencil pointing to eaxctly where they are.
 

Attachments

  • sega_e4.jpg
    sega_e4.jpg
    20.2 KB · Views: 131
  • sega_e4.jpg
    sega_e4.jpg
    20.2 KB · Views: 122
Next replace all parts making shure that the shield is covered on the psu board(the thin clear plastic cover).

Turn the machine on and sit back and enjoy full screen rgb heaven.

I do have better info than the type i have posted,I will dig it out and post asap.

Please exscuse my poor pictures as they where taken with a real cheap and nasty dijital camera.

Here is a pic of a machine i modded last night.

Thanks all,

Ian. :hehehe:
 

Attachments

  • sat_7.jpg
    sat_7.jpg
    18.8 KB · Views: 111
  • sat_7.jpg
    sat_7.jpg
    18.8 KB · Views: 115
Back
Top